# Sally's Flower Shop - Models
# Getting Started
The first step is to create a new module inside of the project folder. To do this, create a new folder for the module
and ensure that it contains __init__.py and __manifest__.py. Alternatively, we can use
the scaffolder (opens new window)
to automate the creation of the module.
We shall name our module flower_shop.
# Model and Fields
Next, we will create a
Python model (opens new window) to represent flowers
called flower.py. All Python models should be
placed inside models folder and the model files must be imported in __init__.py in the same folder. Moreover, the
entirety of models folder has to be imported in the module-level __init__.py file. Therefore, we get the following
file structure in our project so far:
flower_shop
├── models
│   ├── flower.py
│   └── __init__.py
├── __init__.py
└── __manifest__.py
In flower.py, we will define the model with the necessary attributes. Odoo provides a variety
of primitive and
relational fields (opens new window).
One of the attributes is Season. We can define a flower's season by specifying a start date and an end date. Hence, two date fields are needed to track seasons.
season_start = fields.Date()
season_end = fields.Date()
Often, it is helpful to provide tooltips especially if the field's label is not very obvious. This is achieved by using
the help field attribute. We will use this for the field Watering frequency.
watering_frequency = fields.Integer(help="Frequency is in number of days")
# Access Rights
For any new model, we have to define
its access rights (opens new window).
This is defined in a CSV file. For now, we will grant full access to all users belonging to the
group base.group_user (also known as internal users). Note that the name of the model uses the underscore notation and is prefixed by model_.
So if your model is named flower.flower, it is converted to model_flower_flower.
id,name,model_id:id,group_id:id,perm_read,perm_write,perm_create,perm_unlink
access_flower,access_flower,model_flower_flower,base.group_user,1,1,1,1
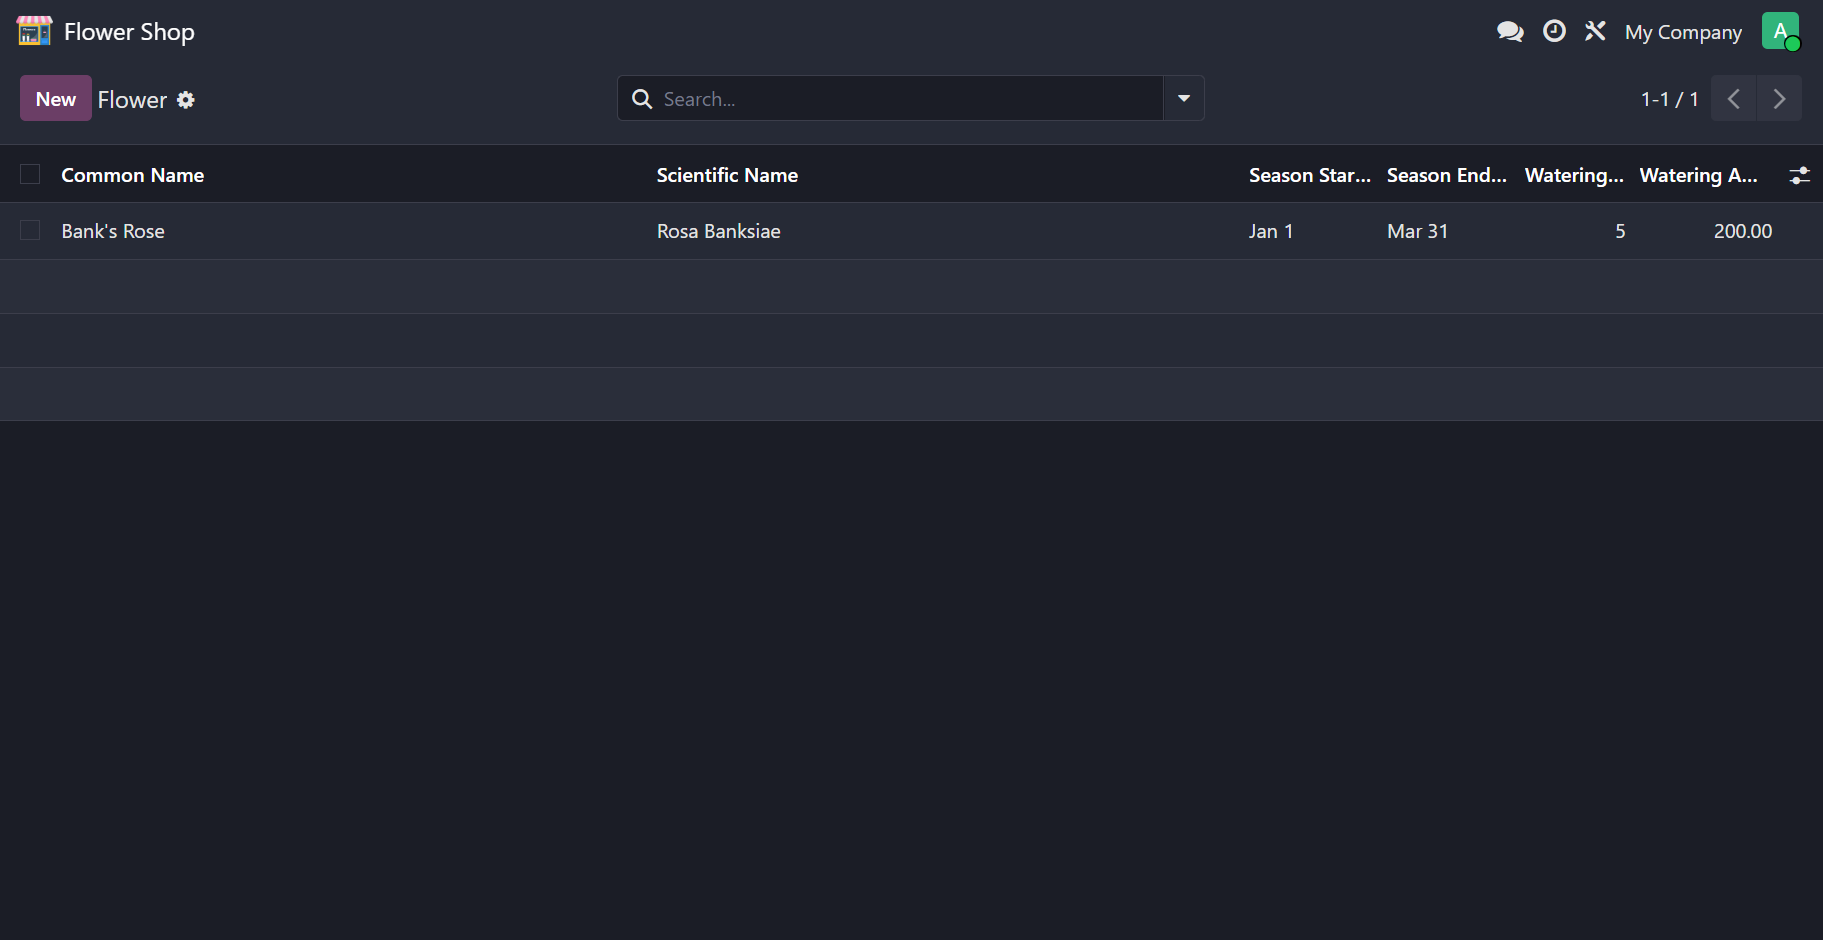
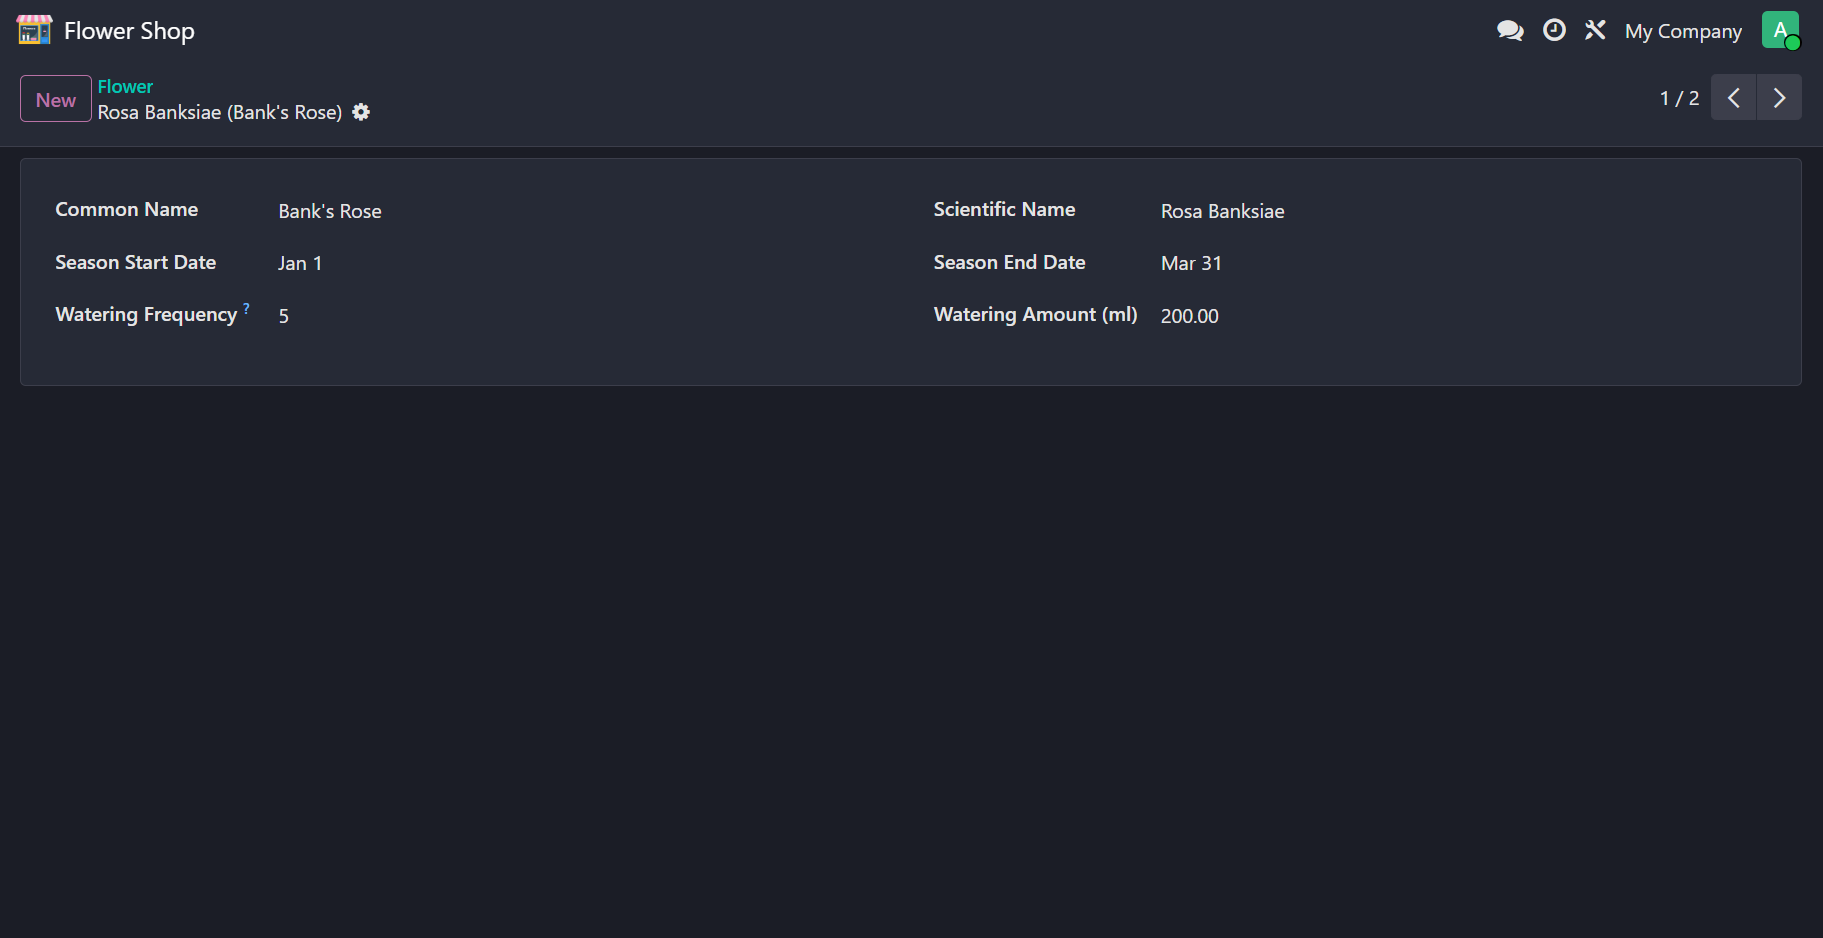
# List and Form Views
We have to define views (opens new window) for our new
model. In order to render a list of all the flower records in the database, we will
define a list view in XML. Furthermore, there will be a form view that would
display a single flower record. Like every other view in Odoo, these two views belong to the model ir.ui.view and are
stored as records in the PostgreSQL table ir_ui_view. The way we specify the different types of views is by using
special tags like form or list inside the arch field.
<odoo>
    <record id="..." model="ir.ui.view">
        <field name="name">view.flower.form</field>
        <field name="model">flower.flower</field>
        <field name="arch" type="xml">
            <form>
                ...
            </form>
        </field>
    </record>
</odoo>
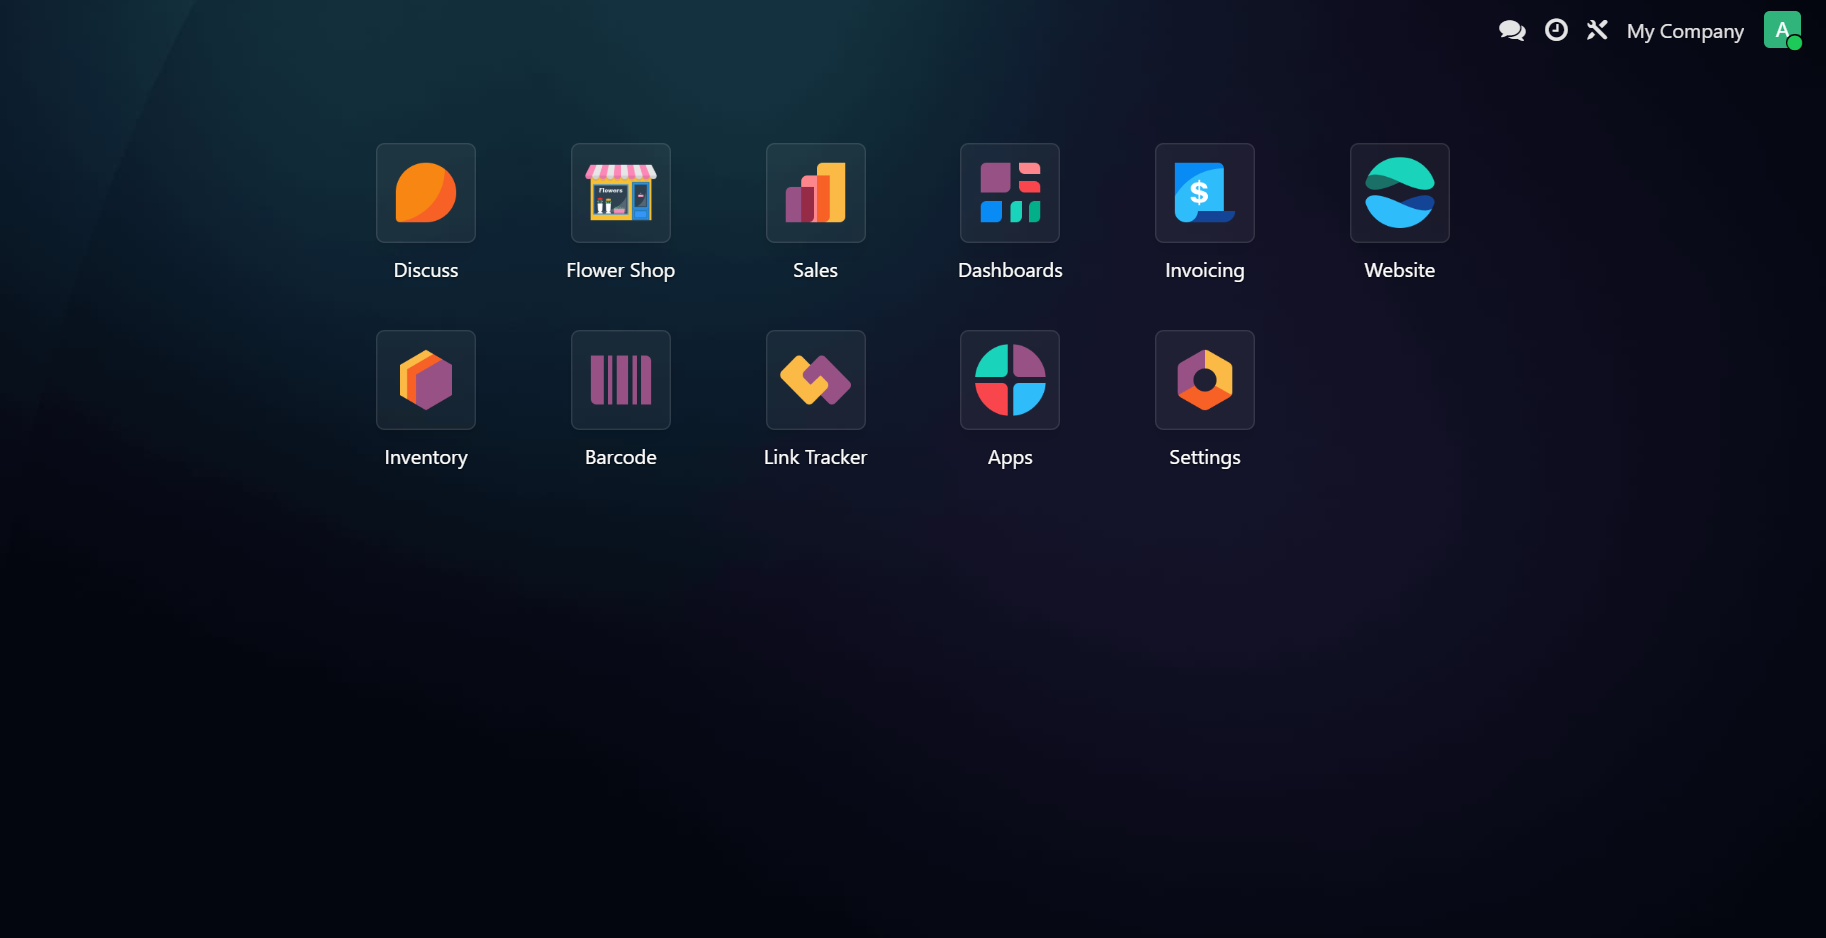
# Window Action and Menu Item
Once the model, views and access rights are defined, this brings us to menu items (opens new window) - interactive, clickable components that can redirect the user. In addition, we have to let the menu item know what view to render and this is done by associating a window action (opens new window) with it. Both menu items and actions can be either specified in the same XML file as the views or defined in their own files, as long as they are included in the manifest. Moreover, it is important these XML records are loaded in an orderly manner starting with views and then actions and then ending with menu items.
When a menu item does not have the parent attribute, it is considered a root, and it appears as an icon on the home
screen. This is how we define a root menu item for new apps in Odoo.
Moreover, we can bind an action and optionally provide an icon using the attributes action and web_icon
respectively.
If you wish to create Odoo-style icons, check out this free tool (opens new window).
<odoo>
    <menuitem id="menu_flower_shop_root"
              name="Sally's Flower Shop"
              action="your_window_action_id"
              web_icon="your_module_name,static/description/icon.png"/>
</odoo>
Upon successful installation of the module, the app icon should appear on the home screen.
The list and form views should look similar to the following: